Wednesday, March 23, 2011

Easter Outfit #2

This dress is adorable but made me age about 10 years while doing it. I made so many silly mistakes on it which required so much seam ripping!! Argh! I have used 2 different dress patterns for Grace and was not sure which one I wanted to use this time.

Should I use the very easy pleated one?
or go with the more intricate gathered one with sleeves?
I decided to go with the second one since we are having some family pictures taken by a friend of mine and wanted the dresses to be extra cute.
This is a tough pattern though and I would not recommend it for new sewers. The sleeves took a really long time for me but I think they are my favorite part of the dress. The back looks really cute, too! I debated about using the green buttons but I did not have any white or pink buttons so the green won.
One problem I am having is getting my sewing machine to do a button hole where the bodice of the dress meets the skirt. I guess it is too much fabric because the button hole foot gets stuck and won't advance beyond that bump in the dress. Anyone else have this problem or solution to it? I solved it this time by turning the dress and having the button hole run horizontal instead of vertical. It will work but I am eager to figure out how to make the other way work.

Want to see Gabe's coordinating romper? I will have pics of Isabelle's dress soon!

Easter Outfit #1

Gabe's Easter outfit was fun to do because it is the first time I tackled plaid and really focused on all the lines matching up. I have been afraid of plaids before and usually choose fabric that does not require such detailed matching. I decided to do it now because I love the fabric from Chez Ami and it looks great with the other Chez Ami fabric that I am using for his sisters' Easter outfits. It was not as hard as I thought it was going to be. What I learned from this experience is that when you have to match a pattern, you cannot double the fabric over to cut pieces. You need to cut each piece out individually to make sure that the corresponding notches on different pattern pieces line up. Yes, it is a pain to do, but all that tedious work at the beginning really pays off with a nice outfit at the end.

I first made this pattern in Pittsburgh Steeler's fabric for a friend's son. You can see here how I did not match up the notches and how the pattern did not exactly match up horizontally. It did not really matter because the wording and helmets were on an angle anyway. Next time, though, I will be more aware of lining things up better. Oh, how much better we get with time and practice!

The overall pattern is incredibly simple. I still am not a huge fan of pockets but they are growing on me. It is just really hard to make sure they don't shift when you sew them. When they shift, you wind up sewing them crooked and that is really obvious with some fabrics.

I can't wait to see how cute Gabe looks in this romper with his sisters who will be in coordinating outfits. Stay tuned!

Wednesday, March 2, 2011

Pretty in pink

This dress turned out just as cute as I imagined it would be. There is a local line of children's clothing called Chez Ami by a designer named Patsy Aiken. I love a lot of her ideas but her clothes are a bit pricey. She is really good at knowing what coordinates well... like when to accent a flower fabric with a plaid band or when to use dots with prints. What I have started doing is cutting out pictures from her catalog and trying to replicate what she does on my own. One of the dresses that I think is so adorable is a yellow dress with white polka dots with rickrack sewn across the middle. I could not find the picture of the dress on her site so here is the top and bloomers with the same idea.Isn't that cute? I set out to replicate it and had a lot of fun doing it. I have this very simple A-line dress pattern that I have been using a bit lately because it only has 4 pieces and it so simple to do. Isabelle picked out this pink fabric with white dots and then I found cute flower rickrack to go with it. Fun! Fun! Fun! Of course, I used the leftover rickrack to make a simple "I" on the top. I think it tied everything together nicely. The good thing about using the rickrack for the monogram is that I will easily be able to take it out and use this dress for Grace when she gets older.
Isabelle loves her new dress!!! The timing was really perfect because she has been really sick these past few days and I think getting dolled up in pink was just the medicine she needed!!! We have one girlie girl on our hands.
Stay tuned for this fabric possibly to make an appearance in the Easter dresses...

Sunday, February 20, 2011

Burp cloth mania!

I have been putting out a lot of sewn baby gifts lately and am having so much fun! My best friend is having a baby in June and I am trying not to go too sewing crazy for baby Eliana but it is very hard to control myself!!! My favorite baby gift is a monogrammed burp cloth.
I love giving these because every baby needs a burp cloth and it is so handy to have a burp cloth with your baby's name or initials on it to send with your baby to church nursery, daycare, or wherever there are a lot of other babies. They are also very easy and fast to make. All you do is find fun ribbon and use the baby's initials and you have a great gift that is completely functional! Write the baby's initials on the burp cloth with a washable fabric marker and sew over it with a zigzag stitch. The marker will come out with some water.
If you do not know the baby's initials (and please don't give the mom a hard time if she does not share it!), just monogram the last name like here

or the first initial of the last name like this one for my friend whose last name is Gainor.
This double-sided burp cloth is a little bit more challenging because the ribbon wraps completely around the burp cloth so you need to make sure your stitching on one side of the ribbon lines up just right with the other side of the ribbon (aka you need to make sure your straight stitch on one side catches the other side).

Another fun idea is to make a burp cloth that matches a pair of baby shoes and a romper like these here. Check out how to do it!

Friday, February 18, 2011

Matching corduroy

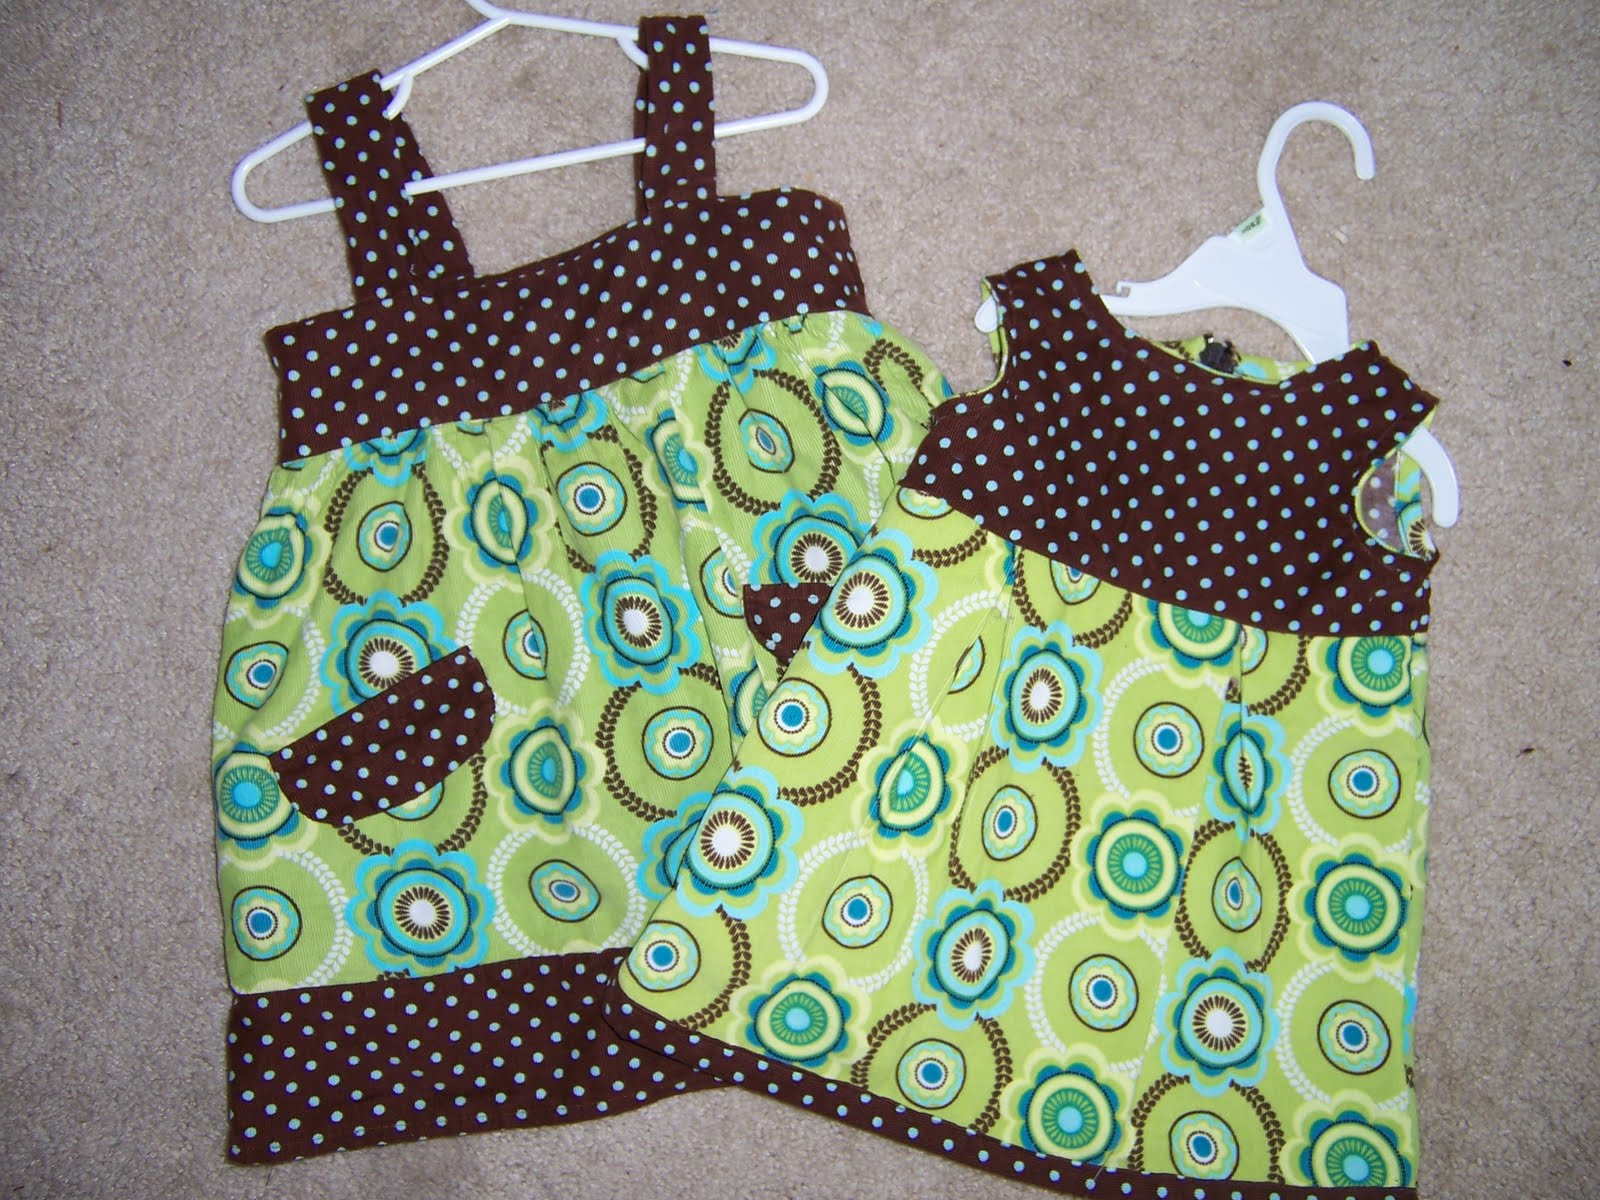
These matching dresses for my girls put the biggest smile one my face because I think they are just so adorable. This McCall's pattern is very easy and I have made dresses from it a few times. I made Isabelle's dress a while ago as part of matching set with her cousin and also for her Christmas dress.
This is the second time I used this Butterick dress pattern for Grace. The first time was her Valentine's Day dress. It is such a simple pattern!! This time I used the dress fabric for the bias tape on the armholes and neckline instead of buying bias tape. I think the accent is really great!!!


Sunday, February 13, 2011

Happy Valentine's Day!!

Love is in the air! You know I just had to make some matching Valentine's dresses for my girls.

I had a lot of fun making Isabelle's dress from the pattern in a book called Absolutely A-Line. It uses one simple a-line pattern but gives you a bunch of different ideas for changing the dress up. The book had a cute idea where you put snaps on the front of the dress and then cut out felt shapes (the book used flowers) and then put the other half of the snap on the flowers so you can snap the flowers onto the dress in different patterns each time your child wears it. I built on that idea and decided to cut out hearts and attach them to the dress in the middle of each heart with a heart button (instead of a snap). I made the two hearts at the bottom of the dress into pockets and monogrammed one of them for Isabelle. I used a straight stitch for the "I" instead of a zigzag stitch so it would be a bit more feminine and delicate.
Grace is getting big enough now where she can actually fill out a dress and it doesn't look silly.
I used this Butterick pattern which I have fallen in love with because the dress and underwear patterns are so simple! Butterick does a great job rating their patterns according to difficulty and I really appreciate that because sometimes you just need to start simple and sometimes you feel frisky and want to try something advanced. It's nice that the ratings help you focus on the type of project you want to accomplish.
The only time-consuming part of the whole dress and underwear was using the bias tape on the neck and armpits. I would highly recommend this pattern if you are looking for a great baby dress. I love the pleats!!

Want to see some other matching outfits? Check them out!

Wednesday, January 19, 2011

Matching Christmas bibs

You know those cute little bibs you get as a present from people? Well, cute describes them well, but practical they are NOT! We have a couple of Christmas bibs but they are tiny and barely cover the food-spillage domain. Our son, Gabe, is especially adept at making a mess on his clothes during mealtime so we need heavy duty bibs in our house. Answer: sew bibs for them using old towels and cute fabric.

I used a bib that we had that was nice and big as my pattern. For the material, we have these red towels that we barely use so I used them since the red would look great for Christmas and the terry cloth is perfect for bibs. I cut out two pieces for each bib so that it would have two layers for durability and also because I planned on appliqueing on the top layer (and the second layer would hide the stitching on the underside of the top layer).

I decided to applique their initials and Christmas trees on the red terry cloth using leftover Christmas fabric I had.
These bibs have gotten so much wear and tear and have held up really well. They are also fun to make because they are easy to make, take very little time to make, and the design possibilities are endless! I will change a couple of things for next time:
  1. The towels I cut the bibs from were very thick towels. The two layers of thick terry cloth made the bib a little stuff so I probably could have used a coordinating fabric for the bottom layer instead of the terry cloth.
  2. To attach the front piece of terry cloth to the back piece, I sewed the wrong sides together for the outer edge of the bib, turned the bib right side out and then used bias binding for the neck (inner edge) to finish it off. I did this because I did not have enough bias binding in my stash to go around the complete outside of both bibs and I did not feel like making more. BUT, the towels I used for the bibs were very thick so when I turned the bib right side out after sewing around the outside, the seam on the inside of the two layers makes a bit of a bulge and almost makes the bib a bit puffy. Next time, I will not be lazy and will go ahead and make bias binding to go around the entire outside of both bibs. I do not love the process of making or using bias binding, but it will pay off in the end. I think it would be really cute to use the same fabric for the bias binding that you use for appliqueing.
  3. These bibs have been washed a lot and I can see where some of the applique fabric has separated from the applique stitching. I will make my zigzag stitched wider next time to make sure that the applique fabric is really caught in the stitches and anchored well to the main fabric.
This picture below shows a better picture of Isabelle's bib even though it is on Gabe. It is also just an adorable picture of Gabe and one of our friends' little girl named Grace (great name, huh?).

Back in the swing of blogging

I know! I know!! I have been out of the blogging loop for a while but I am ok with that. We had a wonderful Thanksgiving and Christmas season!! I thought I would get a ton of sewing done over that time because my husband was home for a week after Christmas, but other things crept up and stole the time which is totally fine. I do have quite a few projects which I need to update you all and blog about (sorry about the preposition thing there!). In the meantime, here is a picture of one of the things that kept us busy over Christmas...

Monday, January 17, 2011

Matching Aprons

These matching Mom-and-me aprons were so much fun to make for my friend Roxanne and her daughter, Haley. Aprons are awesome because you don't really need a pattern! "Why not?" you ask? Because you can use aprons you already have as the pattern! Aprons are so fun because the design possibilities are endless! Roxanne picked out the adorable purple fabric and cute eyelet trim (yellow for her and green for her daughter).

For Roxanne's, I thought about putting her 3 initials or just an "R" on it but since these aprons were meant for mommy-daughter cooking times and all daughters know their mom as "Mom", I changed my mind as appliqued "Mom" on hers with a cute yellow butterfly fabric and green thread. The pockets and ties are made out of the same fabric the applique fabric.
Haley's apron was so much fun, too! She prefers green, so the pocket, trim, and ties are in a cute green.

For Haley's apron, I thought she might like her name on it in a pretty font, so I tried my hand at embroidery. I found a cute font online and wrote Haley's name in that font on the apron with a temporary marker. I haven't done a lot of embroidery but I am getting better and better each time.


Are you intimidated by embroidery like I was? Don't be!!! All it is is your basic zigzag stitch with very little spaces between stitches. I don't have a hoop or anything fancy. I just take my time and have fun!